Balusters & Railings
Precast Baluster Installation Planning
If you are laying out a balustrade, this page brings the main spacing, materials, and installation notes into one place so you can plan the job before choosing sections and rails.

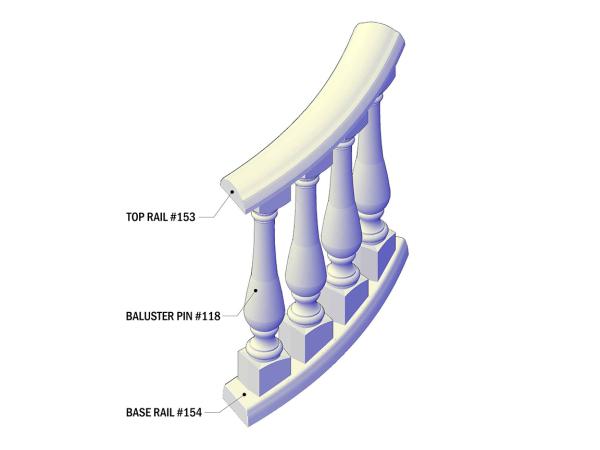
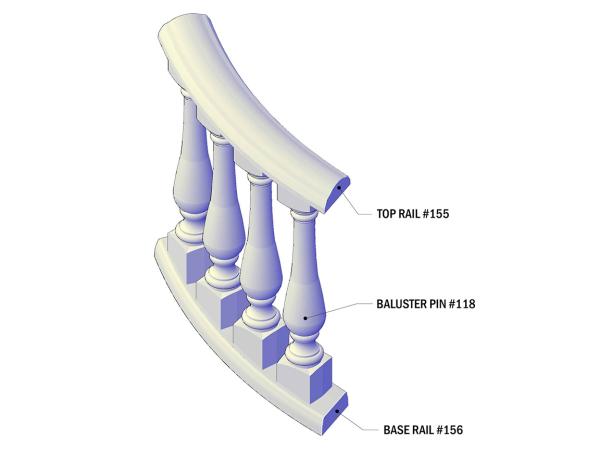
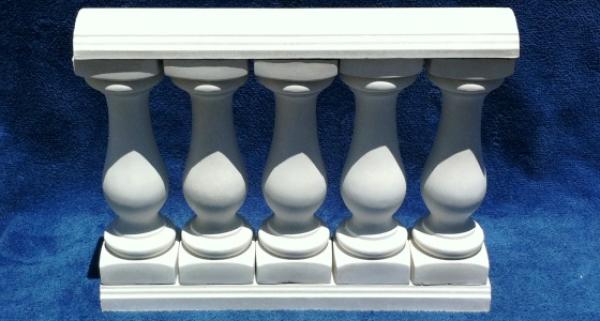
Baluster Sections to Compare
These baluster pieces show the profiles and railing components customers often review while planning spacing and installation.
Step-by-step baluster installation overview
-
1
Set the bottom rail first
Start on a level surface and set the bottom rail before anything else. Your attachment method will depend on whether you are working over wood, concrete slab, block wall, or a footing.
-
2
Place each baluster pin evenly
Baluster sections are built around repeatable spacing. Place the pins into the precast bottom-rail holes, keep the rebar aligned, and carry that spacing consistently across the run.
-
3
Secure the pins with the right setting material
Use a job-appropriate adhesive or mortar system that matches the surface conditions and keeps the pins stable while the material cures.
-
4
Set the top rail and keep everything plumb
Once the pins are stable, set the top rail over the exposed rebar and keep the balusters plumb and level until the setting material dries. Some jobs may also require perpendicular rebar at the top rail based on local code or engineering.
-
5
Finish the joints and plan ahead for curves or stairs
Clean excess mortar before it dries, keep grout joints tight and consistent, and expect more layout work on radius sections, stairs, or raked elevations. Those installations are usually best handled by experienced masonry installers.
What to check before ordering
Start from a level base, set the bottom rail first, and keep the balusters plumb while the setting material cures.
Match the installation surface to the attachment method, confirm whether the project includes straight runs or radius sections, and plan for plumb alignment while the setting material cures.
For stairs, raked elevations, or curved balustrade layouts, experienced masonry installers are usually the safer path because field cutting and alignment can become more demanding.
Installation drawings and reference PDFs
These references cover section assembly, connection details, curved layouts, and planning checks so you can sort out the field work before materials arrive.
Section Instructions
Use this drawing to review how a standard baluster section is assembled and how the pieces relate to one another before installation starts.
Open PDFConnection Details
Helpful for checking fastening points, reinforcement details, and how the balustrade assembly ties together in the field.
Open PDFPlans and Elevations
Best for understanding the full run of the railing, layout direction, and how sections read across a larger installation.
Open PDFPost to Baluster Instructions
Use this when your baluster run meets posts and you need to review how those transitions are handled.
Open PDFRadius Plans
Important when the layout includes curved or radius sections and you need to confirm how the run changes through the arc.
Open PDFSection View
A quick way to see the component stack-up in profile and confirm rail, pin, and support relationships.
Open PDFLayout Calculator Sheet
Useful when you want a quick reference for section planning, quantities, or layout checks before ordering.
Open PDF